2.7.58 imppClamp
Contents
Menu Information
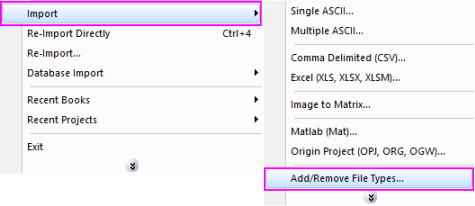
File: Import: pCLAMP (ABF, DAT)
If you do not see this file type, choose File: Import: Add/Remove File Types...
 | To add drag & drop support for a file type, see Import Filter Manager. |
This X-Function supports file re-import. See this topic for details.
Brief Information
Import pCLAMP file up to version 11 (ABF 2)
Command Line Usage
1. imppClamp; //import pclamp file specified in fname$
2. imppClamp fname:="C:\pClampData\Sample.abf";
3. imppClamp fname:="C:\pClampData\Sample.abf" orng:=col(1);
X-Function Execution Options
Please refer to the page for additional option switches when accessing the x-function from script
Variables
| Display Name |
Variable Name |
I/O and Type |
Default Value |
Description |
|---|---|---|---|---|
| File Name | fname |
Input string |
|
Filename of the file to be imported |
| File Info And Data Selection | trfiles |
Input TreeNode |
|
Treenode that specifies the information of the file and data. For more details, please refer to trfiles. |
| Import Options | options |
Input TreeNode |
|
Treenode that specifies importing options |
| Output | orng |
Output Range |
|
This is used in the dialog for displaying the file information and the data information (channels and episodes) in the file. The channels and episodes can
See the syntax here. |
| Header Info | trheader |
Output TreeNode |
|
Use this to specify the output range. |
| Repeat Import | reimp |
Input int |
|
Control how to repeat import the data.
Option list:
|
| Theme Settings of FIle Info And Data Selection | thm |
Input TreeNode |
|
This variable is not designed for users and not available in the GUI as well, which just used to improve the theme settings for the File Info variable and Data Selection variable. |
Description
This X-Function can be used to import pCLAMP (ABF, DAT, ab?) data file.
Details on Some Dialog Options
- Import Options(options)
- Please see this page for more details.
Secondary X-Function controls
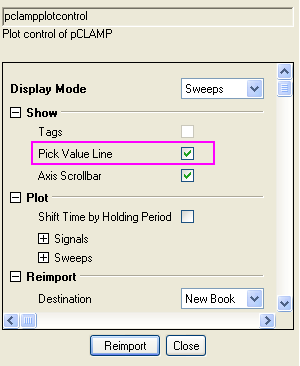
When you import pCLAMP files, you can opt to open a special pCLAMP plotting panel on the left-side of the target workbook.
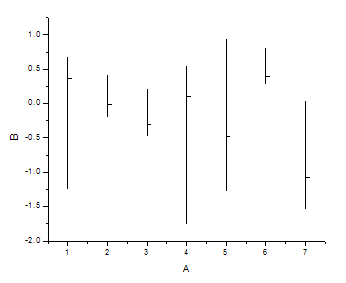
This is done by selecting Show Control Panel for Making Plots under the Import Options branch of the imppClamp dialog box. This panel provides controls for such things as plotting channels and episodes, or display of an auxiliary plot control panel on the graph window. The auxiliary panel's Pick Value Line (see the picture below) control allows you to drag a line on the graph to read plot values and save them to a workbook.
Examples
This example creates a blank workbook named FILAVG by newbook X-Function.
Then it creates new sheets by newsheet X-Function and imports pclamp data files with file name starting with filavg into sheets.
It uses plotpclamp X-Function to plot the pclamp data and use g2w X-Function to merge the graphs into a new sheet in workbook.
////Get Origin Program Files folder
%A=SYSTEM.PATH.PROGRAM$;
//create a book to place pclamp data
newbook s:=0 name:="FILAVG" result:=bkn$;
%b=bkn$;
//set the file1 which will be imported
//fname$="%ASamples\Import and Export\pClamp\FILAVG01.DAT";
string fns, path$="%ASamples\Import and Export\pClamp";
findfiles fname:=fns$ ext:="filavg*.dat";
//findFiles will pack multiple files separated by \r\n, or CRLF
int n = fns.GetNumTokens(CRLF);
int nShtID;
for(int ii = 1; ii <=n; ii++)
{
      fname$=fns.GetToken(ii, CRLF)$;
      newsheet b:=bkn$;
      nShtID = range2UID(sname$);
      //wactive sheet:=uid2name(nShtID)$ book:=bkn$;
       //import the pclamp files
      imppclamp options.Sparklines:=0 options.XFbar:=0 options.names.FNameToBk:=0;
      sname$=uid2name(nShtID)$;
       //Plot
      plotpclamp iw:=sname$ stimulur:=1 scrollbar:=1 ctrl:=0;
      win -a %b;
}
//merge the result graphs into one book (better to the third sheet)
g2w ow:=<new template:=graphs name:=graphs> option:=4;