7.1 Working with Multi-Sheet Workbooks
Contents

|

|
Summary
Origin workbooks are similar to spreadsheets and can have multiple worksheets. Multi-sheet workbooks allow for better organization and higher information density.
What you will learn
This tutorial will teach you how to:
- Add and arrange worksheets.
- Handle metadata.
- Split the worksheet into Panels using Dividers.
Steps
Adding and Arranging Worksheets
- Click the New Project button
 on the Standard Toolbar.
- Right-click on the Sheet1 tab and choose Name and Notes. For Short Name enter Subjects (Note that the sheet has Short Name and a Long Name and you can display either on the tab by right-clicking on the tab and choosing Sheet Name to Show. Note, too, that you can change the tab display name -- whether Long or Short -- by simply double-clicking on the tab and typing in the new name).
- Click on the Add Sheet button and a second sheet, named Sheet1, will be added to the book.
- Double-click on the new Sheet1 tab and enter 2nd Test in the text box that appears. (Alternately, right-click and use the the Name and Notes option again.)
- Right-click on the 2nd Test name and choose Insert. A new sheet, named Sheet1, is inserted between Subjects and 2nd Test. Rename the new sheet 1st Test.
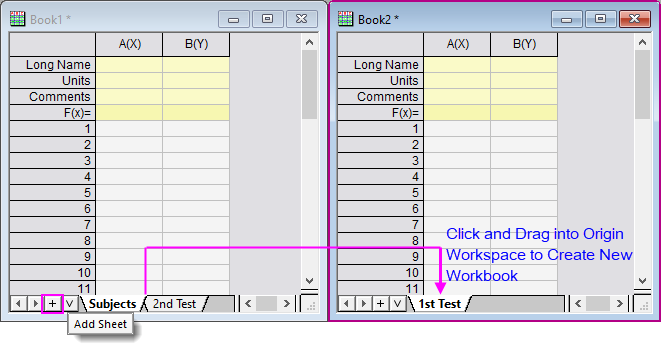
- Left-click and hold down the mouse button on the 1st Test sheet name, drag the mouse over the Origin Workspace and release. The 1st Test sheet will now appear in its own workbook.
- Select Window: Tile Vertically to arrange the workbooks side by side as shown below:
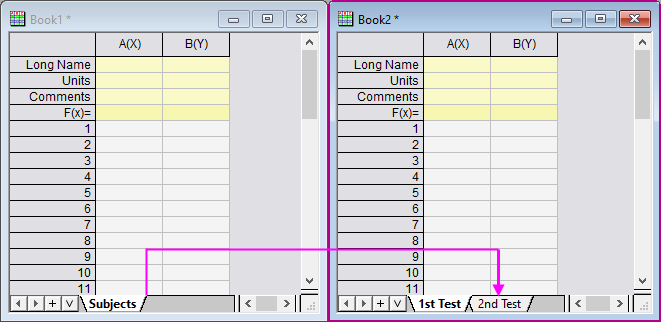
- Drag 2nd Test to the second workbook. This will move the 2nd Test sheet from the original workbook to the new workbook as shown below:
- Click the Save button
 . The Save As dialog will open since the project is yet to be saved. Save this in the User Files Folder as Multi-Sheet Workbooks.opj
| Note: It is also possible to drag and drop sheets within the workbook to change the order. Right-click on any sheet name and note these additional options: Duplicate Without Data, Duplicate, Delete and Navigate. |
Handling Metadata
Add Metadata to the Worksheet
- Click the New Project button on the Standard Toolbar.
- Select Format: Worksheet from the Origin menu (Alternatively press F4 or double-click on the gray area to the right of the columns). The Worksheet Properties dialog opens:
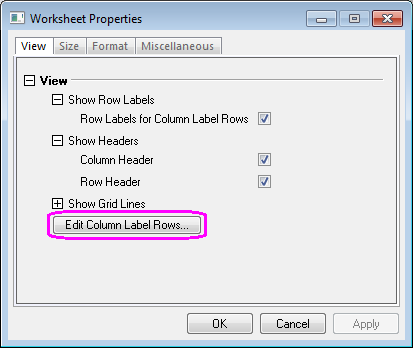
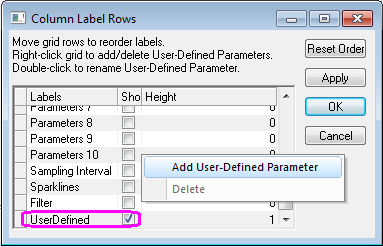
- On the View tab, click the Edit Column Label Rows button. The Column Label Rows dialog opens.
- Right-click on the table and select Add User-Defined Parameter. Scroll down to note that a UserDefined label has been added. The Show box is checked by default.
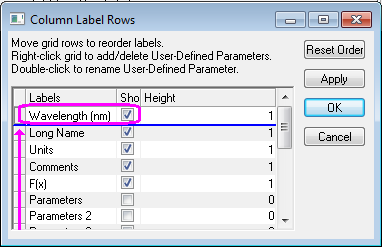
- Double-click on the UserDefined text (or single-click and press F2), and change the UserDefined text to Wavelength (nm).
- Click in the box to the left of Wavelength (nm) and drag it to the top of the list, dropping it above Long Name. This will change the order of the rows as shown below:
- Click OK to close the Column Label Rows dialog.
- Select the Format tab in the Worksheet Properties dialog, and choose LongName from the Apply To drop-down. Check the Rich Text box.
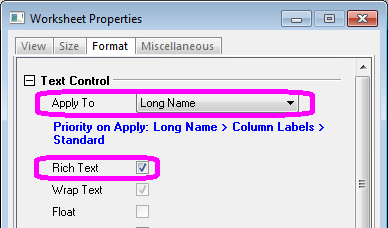
- Click OK to close the Worksheet Properties dialog box.
- Highlight the Comments row and click the Merge Cells button
 on the Style Toolbar to create a row with one cell.
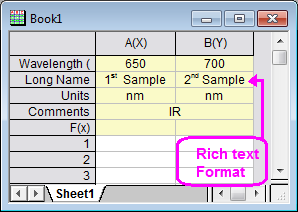
- Enter the values shown below in the Columns A and B header region (Wavelength to Comments).
(Note: Once the Rich Text box is checked for specified cells, double-clicking in the cells to edit them will activate the format buttons . These can be used to apply rich text formatting as shown below):
View Metadata in the Workbook Organizer
- Click on the New Folder button
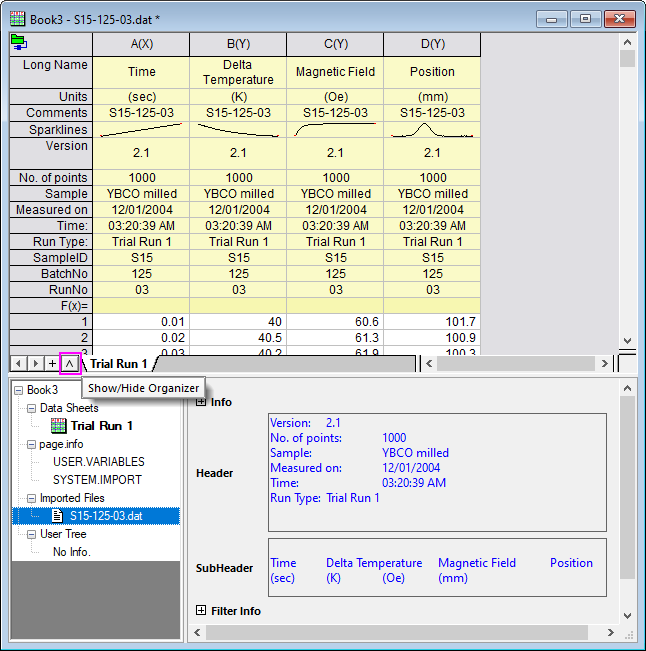
 . Start with an empty worksheet. Select Help: Open Folder: Sample Folder... to open the "Samples" folder. In this folder, open the Import and Export subfolder and find the file S15-125-03.dat. Drag-and-drop this file into the empty worksheet to import it.
 - Click on the Show/Hide Organizer button. The Worksheet Organizer will appear at the bottom of the worksheet.
- Expand the Imported Files branch and view the stored metadata.
Splitting Worksheets into Panels using Dividers
Split from Menu
- Activate the worksheet and highlight a cell.
- Select Window: Split from the Origin menu.
- The worksheet or matrixsheet will be divided into 4 panels by a horizontal and vertical Divider at the highlighted cell. To move the Divider to a new location, drag it to the desired row or column.
- Select Window:Remove Split from the Origin menu to hide the split pointers.
(Note: This process is the same for worksheets and matrixsheets).
Split by Dragging the Divider
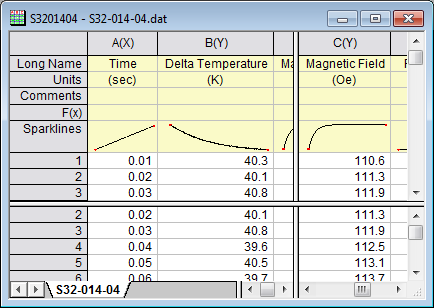
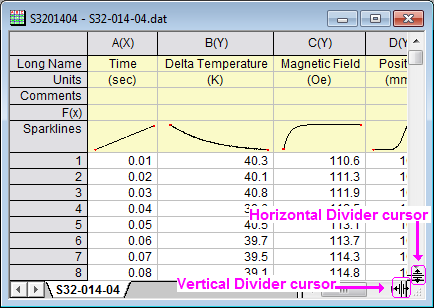
- Point the cursor to the bottom right of the sheet at the end of the vertical scroll bar (for a horizontal Divider) or at the right end of the horizontal scroll bar (for a vertical Divider) as shown below:
- When the pointer changes to a split pointer, drag it to the desired position. A horizontal or vertical Divider will be created.
- A worksheet with horizontal and vertical Dividers is shown below: