4.1.3.6 Editing the Microsoft Visual C++ Project Settings
After closing the Origin Dialog AppWizard and the New Project Information dialog you will need to follow the steps below to edit a few Microsoft Visual C++ project settings. Wherever you see the text <Your Project Name> below substitute the name of your Visual C++ project that you entered on the first page of the Origin Dialog AppWizard.
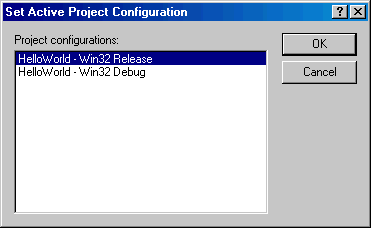
- 1 In Microsoft Visual C++ select the Build:Set Active Configuration menu item, choose <Your Project Name> - Win32 Release from Project Configurations, and then click OK to close the Set Active Project Configuration dialog box.
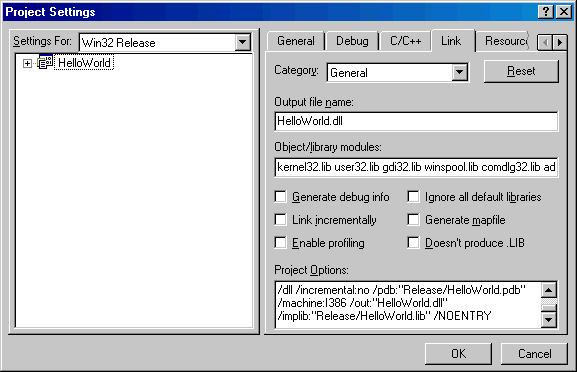
- 2 Select the Project:Settings menu item, select the Link tab in the Project Settings dialog, and then clear and enter <Your Project Name>.DLL for Output file name. Click OK.
- 4.1.3.1 Adding Controls to your Dialog, Tabs, or Wizard Pages
- 4.1.3.2 Additional Resource Topics
- 4.1.3.3 Build Resource-only DLL in Visual Studio 2015
- 4.1.3.4 Choosing the Programming Language to Control your Dialog
- 4.1.3.5 Choosing the Project Type for your Dialog
- 4.1.3.6 Editing the Microsoft Visual C++ Project Settings
- 4.1.3.7 Getting Started Using the Origin Dialog AppWizard
- 4.1.3.8 Microsoft Visual C++ Controls Supported by Dialog Builder
- 4.1.3.9 Opening your Resource and Workspace Files
- 4.1.3.10 Renaming the Symbol Include Header File
- 4.1.3.11 Resizing Dialog, Tab, and Page Resources
- 4.1.3.12 Saving and Building your Resource-only DLL
- 4.1.3.13 Setting the Properties of Controls in your Resource
- 4.1.3.14 Setting the TAB Order of Controls on a Dialog, Tab, or Page
- 4.1.3.15 Specifying Tab (Page) Captions, IDs, and Names
- 4.1.3.16 Specifying the Dialog Caption, ID, and Name