4.6.11 Named Range

|
From Origin 2022, you can define a range variable by directly naming a single cell or (part of) column in the worksheet. The named range can be used to refer to a cell/column in X-Functions, Set Column Values formula, analysis templates, LabTalk scripts etc.
Beginning with Origin 2022b, use named range values as X "From" and "To" values, initial parameter values, lower and upper bounds and fixed parameter values, in the linear fit, nonlinear fit (NLFit), polynomial fit and multiple linear regression dialog boxes.
Contents
Define a range
There are several places in the Origin user-interface where you have the opportunity to define a named range.
by Define Name menu
- Select a single cell or column in the worksheet.
- Select menu Data: Define Name (Ctrl+L).
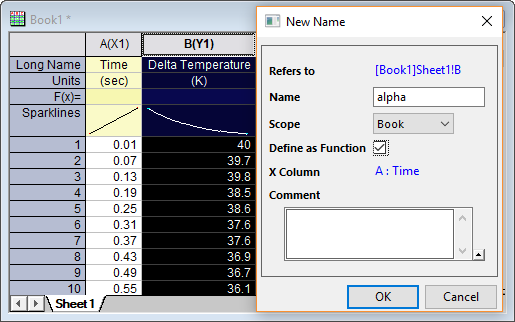
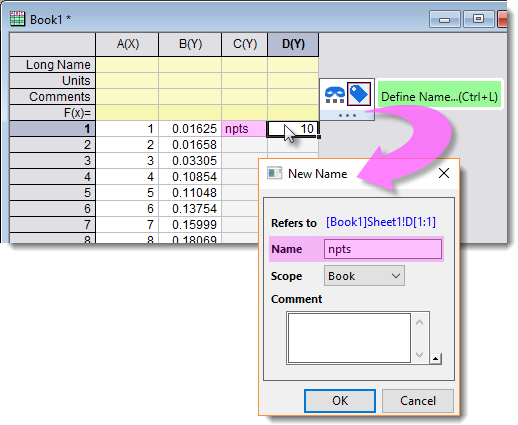
This will open the New Name dialog.
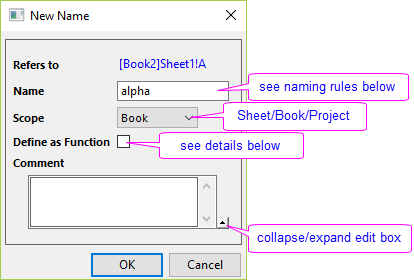
| Name |
Enter a meaningful name for the range variable. Avoid using something like "AAA1", which conflicts with SCN notation. Naming rules:
| ||
|---|---|---|---|
| Scope |
The named range can be 3 scope levels: Worksheet, Workbook, or Project.
| ||
| Define as Function |
When a Y column is selected, check this checkbox to use this column and its corresponding X column as a function. That means, the named XY range can be used to interpolate/extrapolate Y from the given X.
Refer to LabTalk Guide Interpolation document for details.
|
Preventing conflicts in named ranges:
|
by Formula Bar
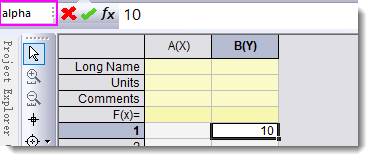
- Select a single cell or column in the worksheet.
- Select menu View: Format Bar to turn on Formula bar.
- In the left most edit box, enter the range name to define a range.
Note:
- the scope of named range added by this way is Book by default.
- Selecting from drop-down list an existed named range will jump to that range.
by Mini Toolbar
- Select a single filled cell in the worksheet.
- Select Define Name button
 from the mini toolbar that appears. This will open the New Name dialog.
If there is a naming-rule satisfied text on the left of the selected cell, the text is auto-picked as the range Name. |
by Name Manager menu
- Select menu Data: Name Manager (Ctrl+F3).
- In the Name Manager dialog that opens, you can add, modify or remove a named range. Refer to the next section for details.
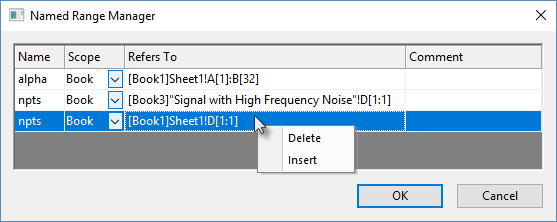
Manage Named Ranges
Named Range Manager
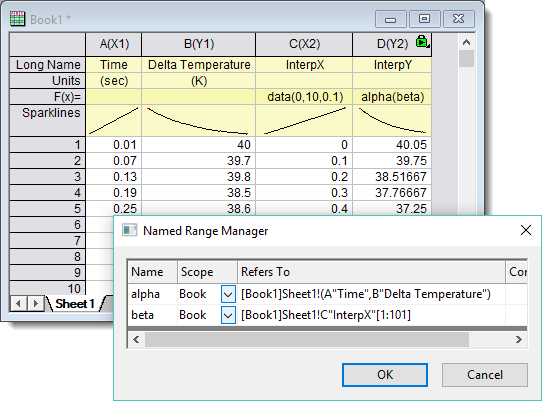
- Select menu Data: Name Manager (Ctrl+F3).
- In the Named Range Manager, you can
- Change names, scope, and edit Comments of an existed range.
- Right click to insert a new range.
- Right click to delete an existed range.
- Multi-selection is supported: press Ctrl key and click rows to select multiple rows; press Shift key and click rows to select a continuous range.
Display in Object Manager
Named ranges list under the worksheet in which they are defined.
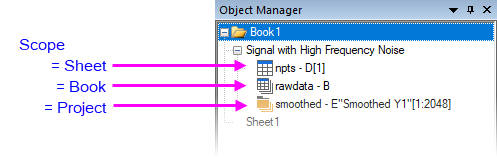
- The assigned range appears beside the range name.
- The named range icon indicates scope.
- A single-click on a named range will highlight the assigned range in the worksheet.
- Double-clicking will open the Named Range Manager with the named range highlighted.
Using Named Range in Label Rows
A named range can be defined for data row or column label row (header row) cells. Use of named range in label rows is useful in the following applications:
- Column/Cell Calculations: Named ranges can be used in Set Values or when defining a cell formula.
- Defining Reference Lines: Named ranges can be used in the Reference Lines dialog when Value Type = Value or Expression.
- Defining a Function Plot: Named ranges can be used when defining a function plot expression (e.g. for 2D Function Plot).
Pay attention to scope when defining your named range. For instance, if you want to use a named range only within certain sheet or book calculations, you can limit scope to Sheet or Book. This allows to use the same Name in a different sheet or book. However, to use a named range throughout the project -- as you would need to do for reference lines or function plots -- you'll need to set Scope = Project. You can always change the scope of a named range using the Named Range Manager. |
Quick tutorial
See these OriginLab blog posts for more examples of usage: |
Below is a simple story of making an analysis template with named range.
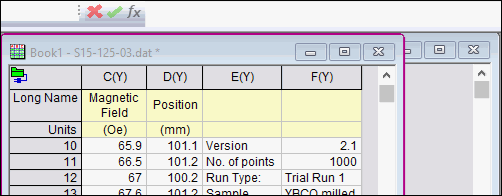
- Create a new workbook. Select menu Data: Connect to File: Text/CSV to import sample data <EXE folder>\Samples\Signal Processing\Signal with High Frequency Noise.dat with default settings.
- Click the connector icon
 and check Exclude Imported when Saving from the context menu.
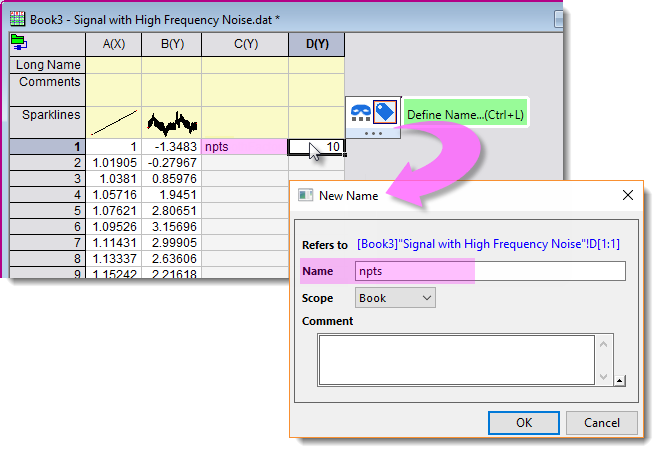
- Add two more columns, col(C) and col(D). In C1, enter text
npts. In D1, enter number10. Click on D1. Select Define Name button from mini-toolbar that appears. - In the New Name dialog, “npts” is auto-filled in Name edit box. Click OK.
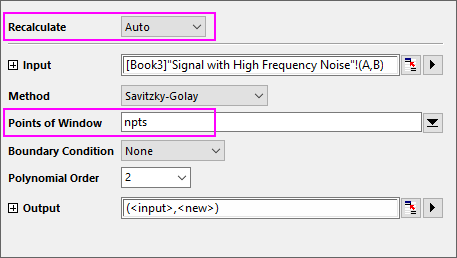
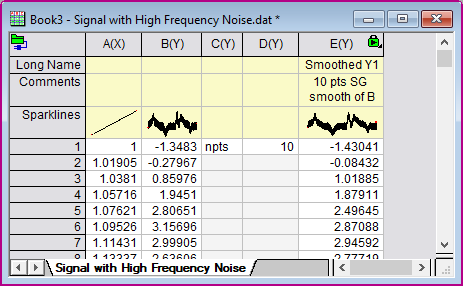
- Highlight col(A) and col(B). Select menu Analysis: Signal Processing: Smooth. In the dialog, set Recalculate to Auto. Enter npts to Points of Window.
- Save this book as an analysis template by menu File: Save Workbook As Analysis Template.