31.10.1 Grouped Scatter

Contents
Data Requirements
Requires at least one Y column as input data. In addition, one or more column(s) provide grouping information.
Creating the Graph
Select required data,
- Select Plot > Categorical: Grouped Scatter... menu
Or
- Click the
 button in the 2D Graphs toolbar
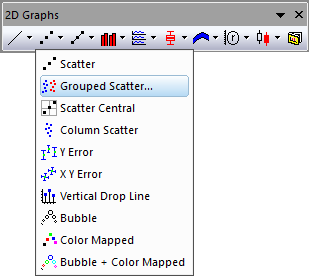
The plot_gscatter will be opened:
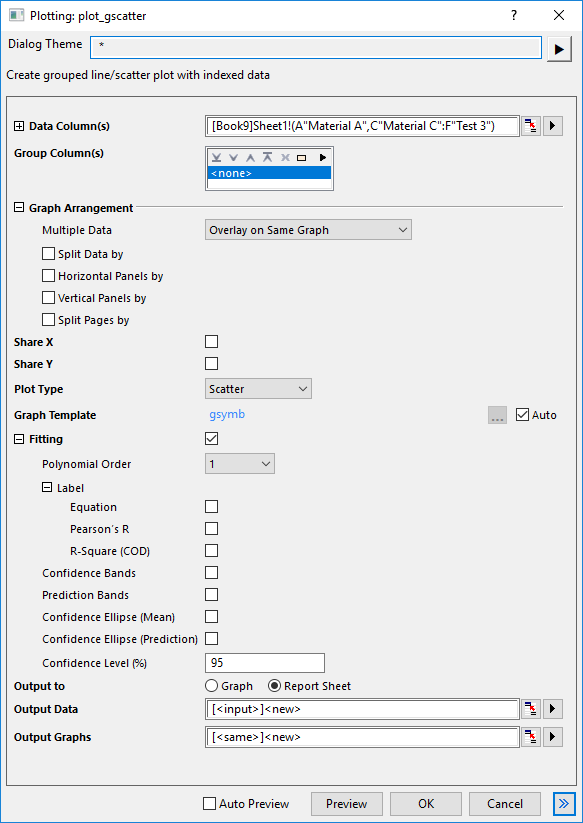
You can select the input data range, add at least one group column, select columns to split page/panel optionally, add fitting curve optionally and determine where to put the plot data and graphs. Click Preview, or OK to create your plot and close the dialog.
The "plot_gscatter" dialog box
| Data Column(s) | This branch is used to specify the input data. |
|---|---|
| Group Column(s) | Choose the categorical column(s) as grouping column(s) |
| Graph Arrangement |
|
| Share X/Share Y | Check the check to share X/Y scale between the graphs and layers. |
| Plot Type | Specify the plot type, scatter, line or line+symbol. |
| Stack | Specify whether to stack the columns/bars when multiple input variables overlay in same graph. You can choose Side by Side, Stacked or 100% Stacked. This option is not avaiable for Plot Type being Scatter. |
| Graph Template | Specify a user template if needed. By default, the Auto check box is checked and the built-in template GBOX is used. |
| Fitting | This branch is used to create fitted curves or bands with reference lines. Only polynomial fit is aviliable here.
|
| Output To | Specify where to output the graph(s), as separate graph window(s) or embed within the report sheet. |
| Output Data | Specify where to output the calculated data. |
| Output Graphs | Specify which sheet the result graphs is output to. |
| Note: The grouping range will be sorted with default alphabetical order. If this is not acceptable , select the worksheet column, right Click and Set as Categorical. Then, you can modify list order on the Categories tab. |
Template
SCATTER.OPTU (installed to the Origin EXE folder)
Notes
- When Share Y is selected, multiple layers in same graph only show Y axis in same row for left layer; when Share X is selected, multiple layers in same graph should only show bottom X axis in same column for bottom layer.
- When there is multiple panels in same graph for multiple input data, if there is a column selected for Split Panels by option, it will arrange each variable in different row, each panel factor combination in different column. When there is only variable or only panel factors, it will wrap the layers by ceil(sqrt(N)), N is number of layers.
Version Information
| Minimum Version: Origin 2019b | Last Update: Origin 2026 |