11.10 The Intersect Gadget
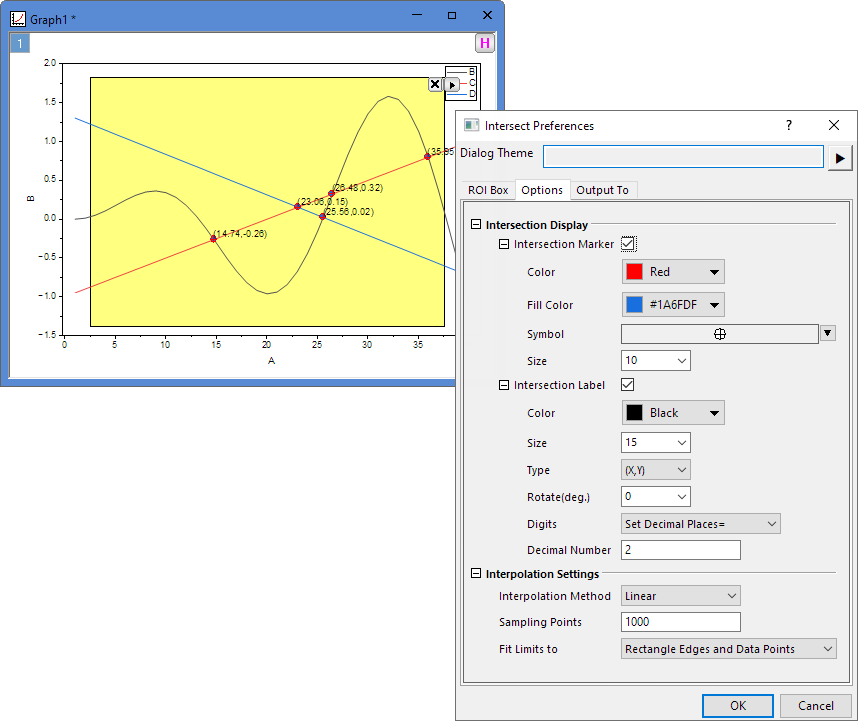
Use the Intersect gadget to calculate the intersection points of the input curves in the ROI. This gadgt is available in the Gadgets menu when a graph window is active.
Contents
ROI Box
| Shape Position | Specify the range on X direction using X1 and X2 values and the range on Y direction using Y1 and Y2 values. |
|---|---|
| Show Tool Name | Specify whether to show the tool name at the top of the rectangle in the graph. The tool name can be specified in Preferences. |
| Fill Color | Specify the color of the rectangle that attaches to the graph. See the list of colors. |
Options
Intersection Display
Specify how to display the intersection points.
Intersection Marker
Select to mark the intersection with symbols. Color, shape and size of symbols can be customized.
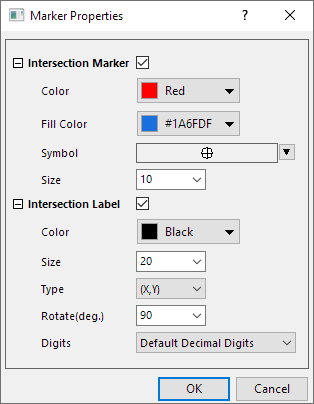
Intersection Label
Check this check box to add labels for the intersections.
| Color | Specify the color of label text |
|---|---|
| Size | Specify the size of label text |
| Type | Indicate type of label (e.g., X, Y, or (X,Y)) |
| Rotate(deg.) | Select the rotation degree of the labels in the drop-down list. |
| Digits | Customize the digits of the label.
|
 |
|
Interpolation Settings
| Interpolation Method | Specify the interpolation method for the input curves. For more information about these three methods, please refer to the Interpolate Extrapolate Help page. |
|---|---|
| Sampling Points | Specify the number of data points to interpolate. |
Output To
| Script Window | Check this box to output results to the Script Window. |
|---|---|
| Result Worksheet Name | Specify the output result worksheet:
|

Fly-out Menu
Click the triangle button  at the top right corner of the ROI tool to open the menu. Menu commands include:
| New Output | Output results to the specified worksheet. |
|---|---|
| Go to Report Worksheet | Activate the report worksheet. |
| Output to Clipboard | When selected (menu item checked) New Output will be placed on the Clipboard. |
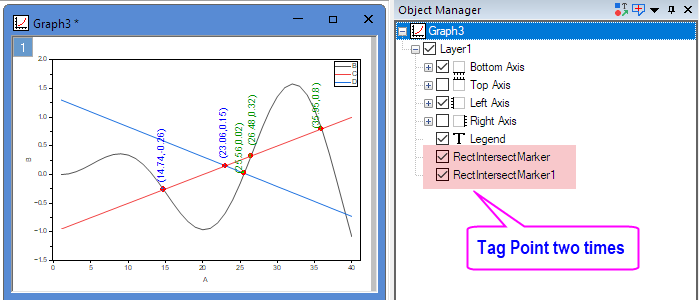
| Tag Points | Tag the found intersection points in the ROI. |
| Change Data | Change fitting data/plot. By default, all plots in current layer will be selected.
|
| Expand to Full Plot(s) Range | Expand the ROI to the full plot(s) range. |
| Save Theme | Save the settings as a theme. |
| Save as <default> | Save the settings as default theme. |
| Load Theme | Load settings from a theme file. |
| Preferences | Open the Intersect Preferences dialog. |