12.1 Analysis Report Sheets and Columns
Analysis operations, such as those performed with the nonlinear curve fitter or with any of Origin/OriginPro's statistical tools, create detailed analysis report sheets. These sheets contain tables that are organized in a tree structure. You can expand or collapse each branch to show or hide each table. The figure shows a typical analysis report sheet generated during a session with the Nonlinear Fitting tool.

Contents
Viewing, editing and copying report tables
Note that the information in each branch can be operated on independently via a number of shortcut menu commands. Click on the down arrow after the branch title or right-click on one cell of the table to access the shortcut menu.


 |
|

| Shortcut menu command | Comments |
|---|---|
|
User comments |
Add comments for any table in the report worksheet. To add comments, right-click on a branch title and select User Comments. Enter your comments into the text box. |
|
Copy Footnote |
The footnotes immediately below the report table include information on statistical test conclusions, curve fitting status, etc. Note that you cannot copy the footnotes directly but you can use this shortcut menu command to copy footnote content to the Clipboard. |
|
Copy |
|
|
Send to Layout |
Copies the selected table or graph branch to a new or last active Layout window, Word or PowerPoint file. If you are sending a report table to Layout window, the table style is kept and you can double click the table to open it in a separate window. Make any changes as desired and close the window to update the table in the Layout. |
|
Send All Open Branches to Word / PowerPoint |
Copy all open branches (including tables and graphs) to a new/ last active Word or PowerPoint file. |
| Create Copy As New Sheet |
Use the Create Copy As New Sheet menu command to copy table content to a new sheet. Origin adds a sheet to the book and pastes in the table content. |
|
Create Transposed Copy As New Sheet |
The Create Transposed Copy menu command does much the same as Create Copy but, in this case, the pasted table is transposed. |
|
Export ASCII... |
Export the current branch of table as ASCII file. The exported file name with the full path will be dumped as a hyperlink to Message Log (docked on the left side of workspace). Click the hyperlink to open the ASCII file directly. |
|
Expand |
Expands or collapses all branches. |
|
Expand Recursively |
Expand or collapse the selected node and any sub-nodes. |
|
Save Node Configuration |
Expand The configuration is saved to \UFF\Themes\AnalysisAndReportTable\0-AnalysisName-Default.ort. Each analysis tool can have one configuration file. |
|
Change Parameters |
Open the dialog box along with the parameters associated with the current output. Same as clicking the operation lock (e.g. |
|
Reset All Graphs |
Reset all embedded graphs to apply the default settings. |
|
Dataset Identifier |
Change the dataset identifier showing in the report tables. Select <Custom>... from the context menu, you are allowed to use the @ Substitution to specify a custom identifier. |
|
Arrange Plots of Same Type in One Graph |
Arrange the plots of same type into one graph. This option is only available when there are multiple graph windows in an output graph branch. |
|
Copy/Paste Format |
You can use the Copy Format menu command to copy table format settings from a table and apply these settings on another table using the Paste Format menu command (see next). |
|
Digits... |
Refer to this section for details. |
|
View |
Table row and column headers are hidden by default. Select Column Header or Row Header to turn them on (check mark present) or off (check mark cleared). Select Row Grids or Column Grids to turn table grid lines on or off. |


Navigating Graphs in a Report Sheet
Graphs in a branch or throughout the entire report sheet can be viewed and navigated in a separate Graph Browser window. The left panel lists the available graphs in the report, allowing you to select a graph or flip through them, while the right panel displays the selected graph(s). This is particularly useful when a report sheet contains many graphs (e.g., Graphical Summary) and scrolling through the sheet is inconvenient.
To open graphs in the Graph Browser:
- Click any graph in the report sheet, and in the Mini-toolbar that appears, click either of the following buttons:
- Show Graphs of This Branch in Browser Graph
 to display all graphs in the current branch;
- Show Graphs of This Report in Browser Graph button
 to display all graphs throughout the report sheet.
- Show Graphs of This Branch in Browser Graph
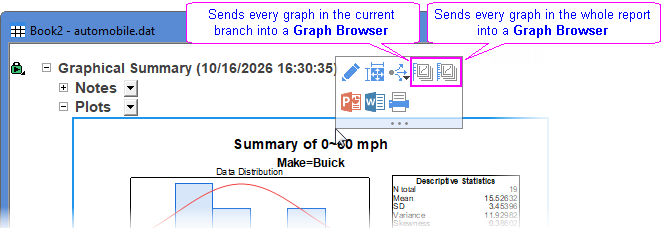
OR,
- Click an empty area of the report sheet, and in the Mini-toolbar that appears, click Show Graphs of This Report in Browser Graph button .
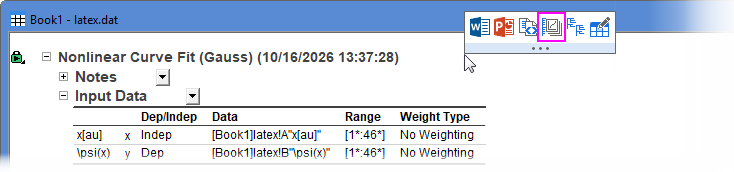
Either way opens a Layout window named Report Graph Browser, displaying all graphs in the current branch or the entire report sheet.
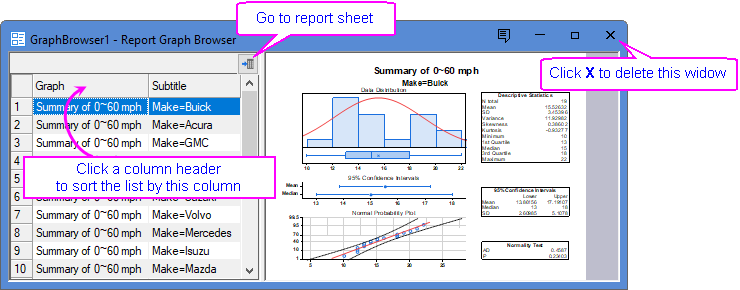
- To navigate graphs: Click a graph in the left panel, or use the Up and Down arror keys to navigate the graph in the right panel.
- To select multiple graphs: In the left panel, click and drag to select continuous graph items. Alternatively, hold down SHIFT key while clicking start and end items to select a continuous range, or hold down CTRL key while clicking to select discontiguous items. On the right panel, all selected graphs are displayed together in an M X N grid.
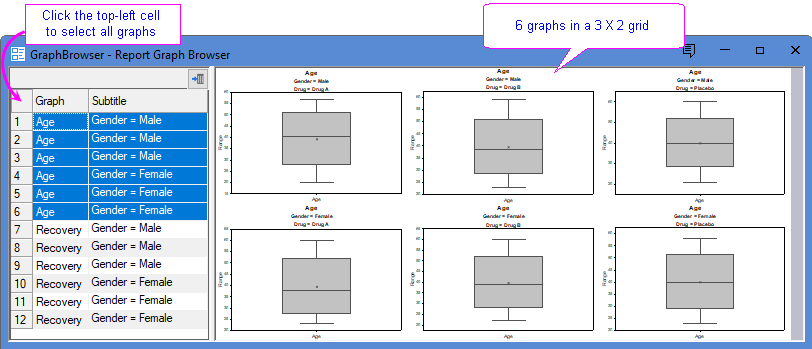
- To quickly jump back to the report sheet: Click the Go to Report button
 at the top-right of the left panel.
- Note that the Graph Browser is for viewing graphs only. To edit a graph, double click the graph to open it in a separate Graph window. See the next section for details.
Editing Graphs in Report Sheet
To edit the embedded graph in the analysis report sheet, double click the graph in the report sheet or in the Report Graph Browser to open it in a temporary Graph window.
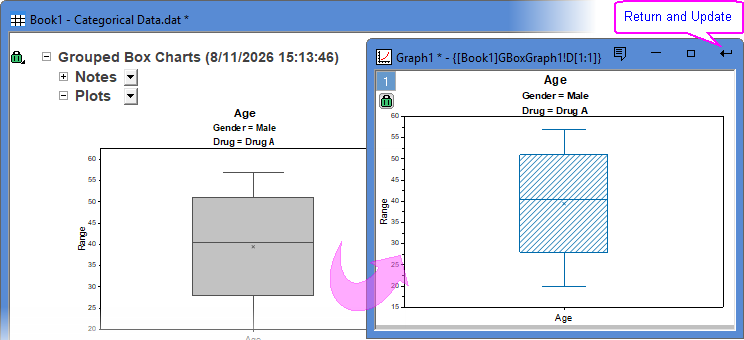
Once you've made your changes in the Graph window, click the Return  button at the top-right of the window. This will close the temporary window and update the graph in the report sheet.
Results written to worksheet columns
Instead of, or sometimes in addition to, creating analysis report sheets, some analysis operations simply create ordinary worksheet columns for output (for example X and Y columns for fit curve values). These output columns will be marked with a lock symbol (if the recalculate mode is set to Manual or Auto). The lock symbol denotes columns that are locked to editing.
Specifying Digits in Report Sheet
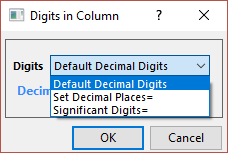
You can chagne the digits of a numeric table, or a column in the table.
To change the digits of a table,
- Click 🔽 button next to a branch title, and select Digits... from the context menu.
or,
- Click any numeric cell of a table, and select Open Digits Dialog button
 from the mini-toolbar.

To change the digits of a numeric column in a table,
- Click any numeric cell of the table, and select Open Column Digits Dialog button
 from the mini-toolbar.
| Digits |
|
|---|---|
| Save as Default | Available for the Digits in Report dialog only.
Select this checkbox to save the digits setting as this analysis' default. All report sheets generated by this analysis tool that after will use this digits setting. Note that it will Not overrides the Digits in Report setting on the Numeric Format tab of the Options dialog box. |
| Notes:
After nonlinear curve fitting or peak analyzing, in the report sheet, you are not allowed to update the digits of the Parameters table using this control. You should open the Change Parameters dialog, go to Parameters tab and do changes in the Significant Digits column. |
Customizing Report Style
The Report Style dialog box provides interface to control Origin's report sheet table style. To know more detail about customizing report style, please refer to this page.