4.3 Google Map Import
Contents

|

|
Summary
The google map import app can help to Load map image from Google Map into Origin.
Instructions
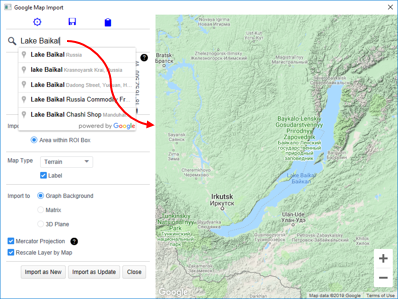
- Click on the Google Map Import icon to launch the dialog.
Use the edit box on top left to search for a location, or simply zoom and pan the map displayed on the right side to your desired location. |
- Use the edit box on top left to search for a location, or simply zoom and pan the map displayed on the right side to your desired location
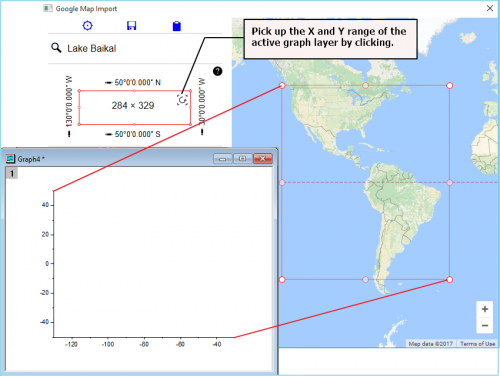
- If you started the dialog from a graph, you can pick up the X and Y range of the active graph layer by clicking on the curved arrow icon located in the upper right corner of the red rectangle on the left panel.
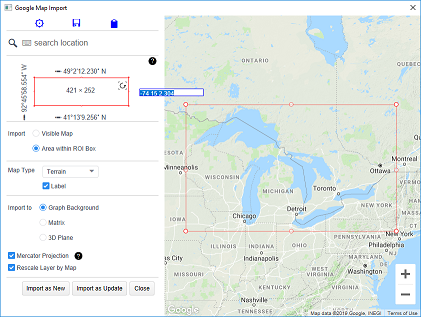
- The map image size that will be imported, is limited to 640x640 pixels.
- By default, the entire map displayed on the right side, or the central part of the display will be imported, depending on the size of the right panel.
- To have more control over the import area, click the Area within ROI Box radio. This will place a red rectangle ROI on the map.
- You can then drag to resize or move the rectangle. Only the map area displayed within the rectangle will then be imported.
- When Area within ROI Box is selected, you can also click on the pencil icon next to this radio to set the boundary more precisely.
- Please be aware that the maximum size is 640*640. The central part no larger than that will be imported when the ROI exceeds that boundary.
- There are 4 map types available: Road Map, Terrain, Satellite, and Hybrid. There is also a Label option which can be turned on or off (except for Satellite type).

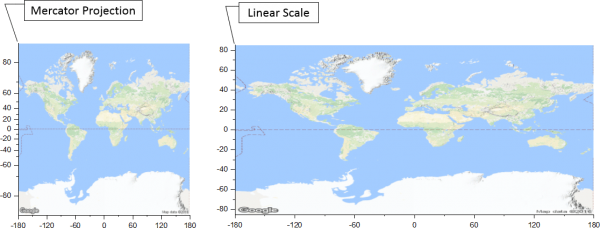
- Google map images use Mercator projection
- Check the Mercator Projection checkbox to set the y axis scale for the Origin graph using a nonlinear formula so that the axis scale matches the Mercator projection.
- If you have data points with specific latitude and longitude values plotted in the layer, these points will exactly match the map location when this checkbox is checked.
- Otherwise the Y scale of the graph layer will be linear, and the axis scale will not match the map locations, particularly when the latitude values cover a large range.
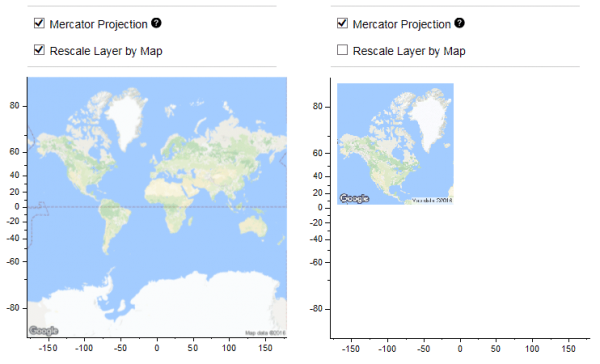
- Check the Rescale Layer by Map checkbox to resize the graph layer such that the axes lengths are in proportion with the X and Y ranges.
- If unchecked, the layer will not be resized.
- If dialog was started from a graph, you will see two buttons:
- Click on the Import as New button to create a new 2D/3D graph, or click on the Import as Update to import the map image into the active graph layer.
- You can then continue to modify the map specifications and click the Import as Update button to replace the current map with a new map.
- If the dialog was not started from a graph, you will see an Import button. Click this button to create a new graph with the map image. Once the graph is created, the Import as New and the Import as Update buttons will become available.
- If the 3D Plane option is checked, this app creates a 3D graph with the map on the bottom of XY plane.
- Click the Close button to close the dialog.