2.41 Bubble Image Area (Pro)
Summary
This Bubble Image Area app can be used to find and characterize bubbles in an image. Bubbles are assumed to be circular.
Tutorial
- Download the sample image file from here to your local PC
- Click the Empirical Mode Decomposition icon,
 from Apps Gallery to bring up the toolbar
- Click Import button and browse to open the image downloaded in the first step in Origin
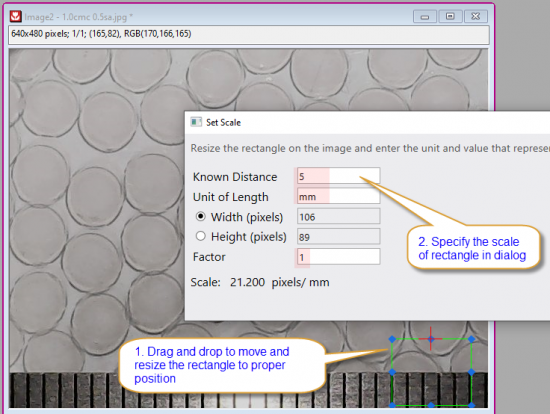
- Click Set Scale button. Move the rectangle to proper position, drag and drop the edge to resize it, make sure the width of rectangle is fit to the desired actual size. Specify the scale in dialog
-
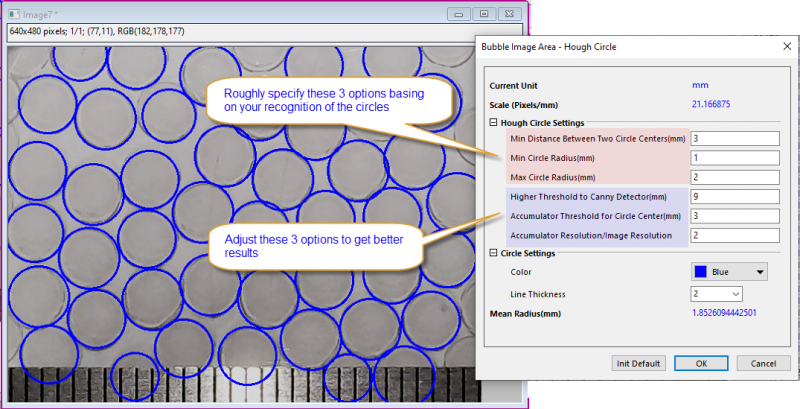
- Click the Hough Circle button. Specify the Hough circle settings to find circles in image automatically. Roughly specify the distance between circle center, minimum and maximum radius of circle basing on the actual size of the circles. You can even use a rule to get these values. Then adjust the values of threshold options to get better results. Once you are satisfied. Click OK to close dialog.
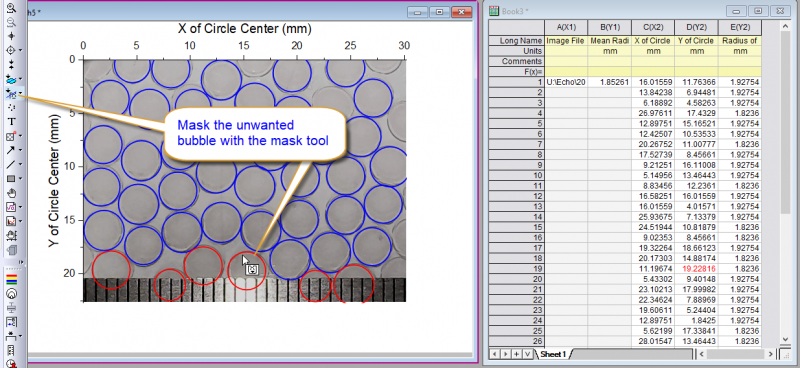
- Click Output & Close button on toolbar to output the results to a graph and workbook.

Removing Unwanted Results
If there are unwanted circles in the automated results, we can further customize the output results to get the new mean value
- Activate the result graph, click the Mask Points on Active Plot button in the left toolbar. Then select the unwanted circles to mask them. The masked circles turns to be red and corresponding Y values in worksheet turn to be red too.
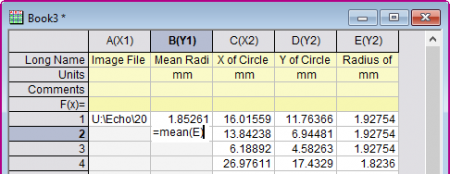
- Add a cell formula, =mean(E), to calculate the mean radius on result worksheet
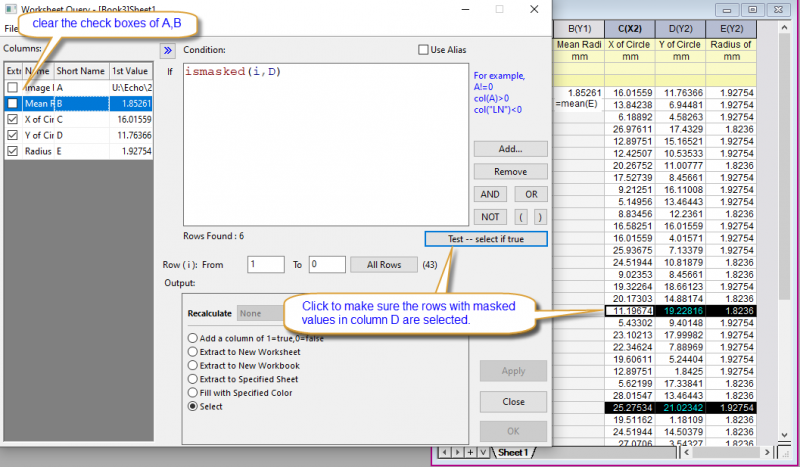
- Next, we are going to delete the rows with unwanted circles with Worksheet Query. Activate the result worksheet, choose menu "Worksheet: Worksheet Query"
- In the opened dialog, clear the check boxes before column A, B. Add script in the Condition box, ismasked(i,D), Click Test--select if true button to make sure the rows with masked values in column D are selected.
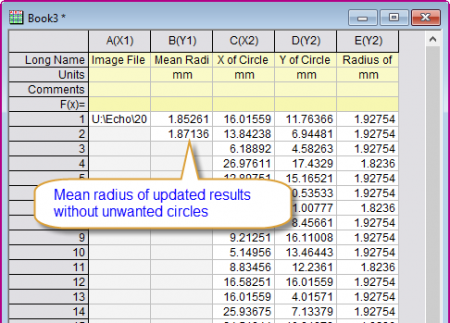
- Right click on the highlighted rows and choose Delete from the context menu. The mean value got by cell formula in step 1 will be updated accordingly
-